Adding a networked printer to your Mac
You can follow these steps to add a networked printer to your Mac.
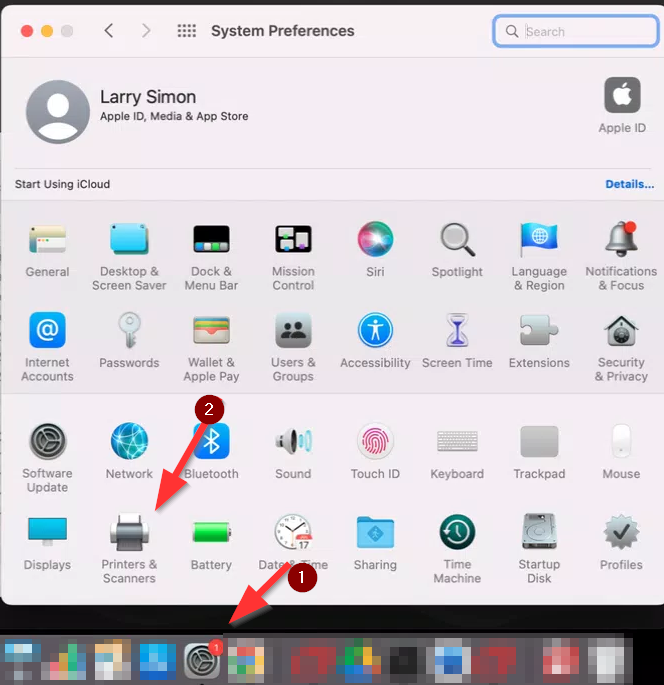
Click System Preferences on your dock and then clicking Printers & Scanners.
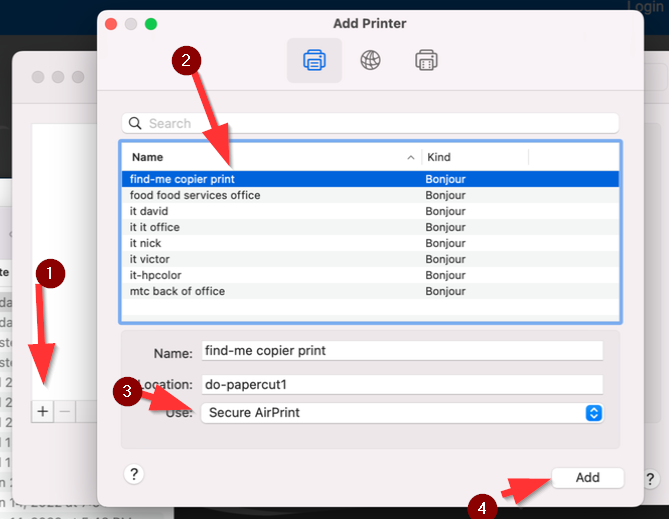
Click the + icon (1) and you will see a list of printers at your school site. Find the printer in your room here, click on it (2), ensure Secure AirPrint is selected under the driver (3) and then click Add (4).
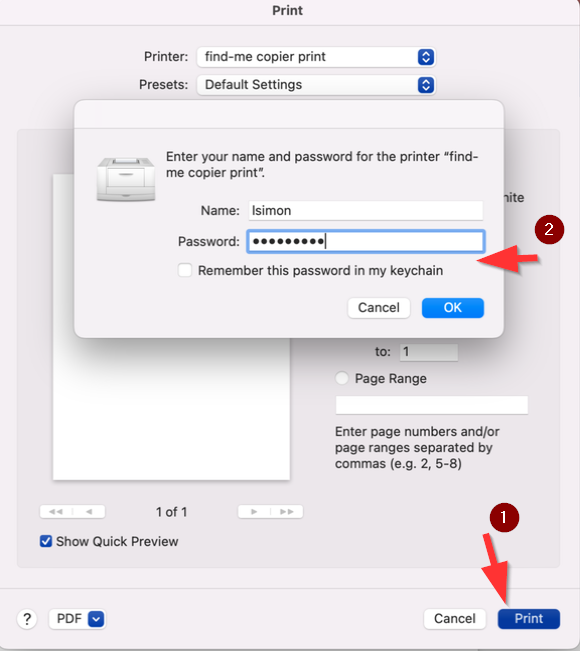
Your printer will now be added to your computer and available for use (note: you may need to restart Chrome in order to see it as an available printer). The first time you print you will be asked to enter your username and password. Your username is your email address without @slusd.us at the end and your password should match your Google account.


