# SLUSD Website
# The Basics - Logging in and the Admin Dashboard
### Logging into your Website
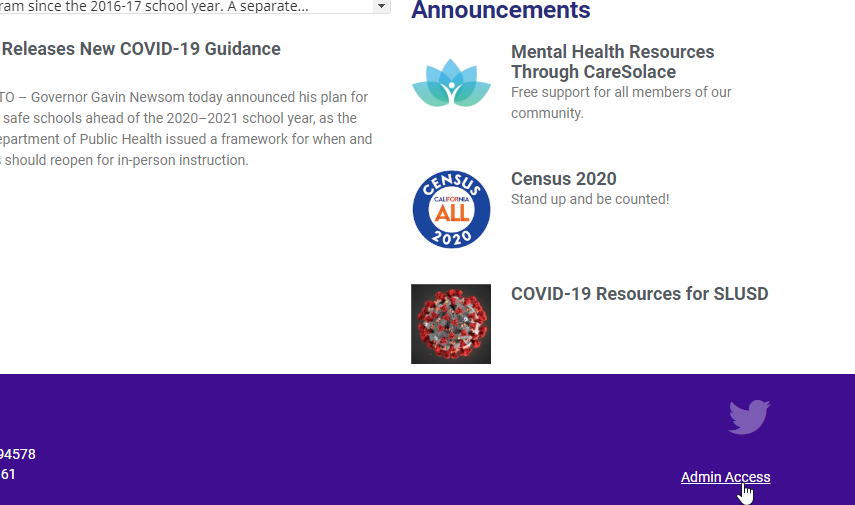
At the bottom right of your school website you will find a link titled "Admin Access" you can click to login to the admin area of the website.
[](https://techhelp.slusd.us/uploads/images/gallery/2022-08/NTMTh2n77CYdIWyv-image-1659471147002.png)
###
### The Admin Page
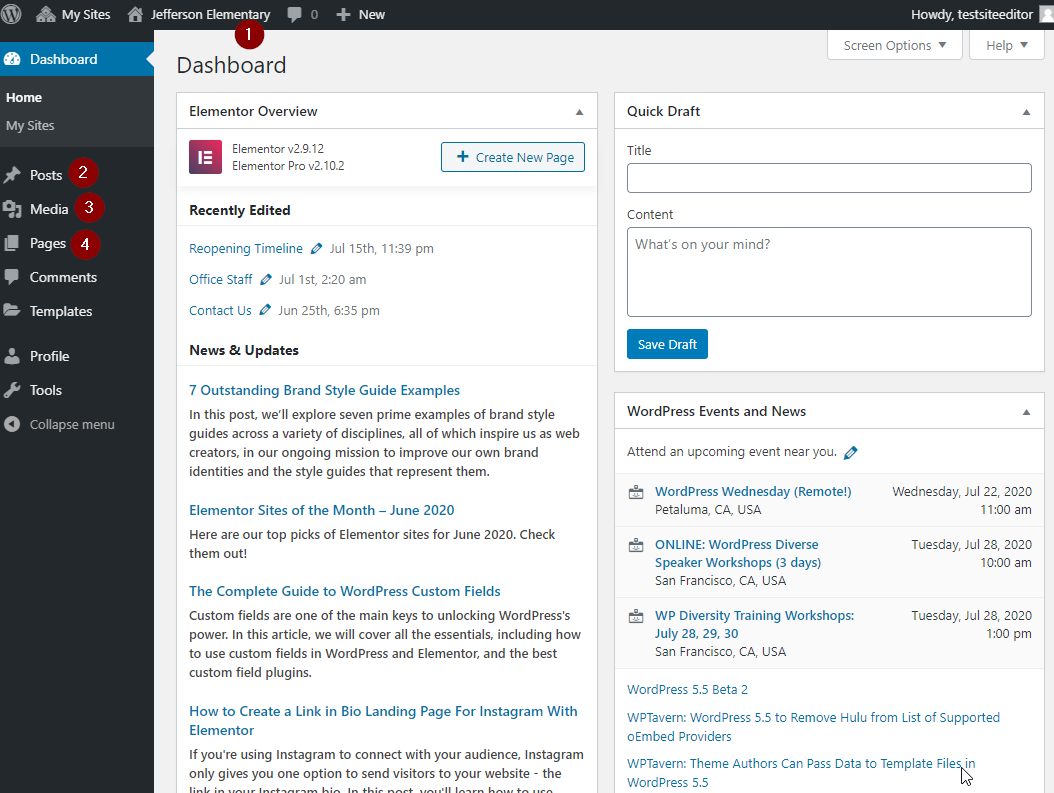
Some of the things you most need to use in the admin panel are as follows.
1. Clicking your school name at the top will take you back to your website and vice versa to go back to the admin panel from your school site.
2. Posts on the left side takes you to the area where news and other frontpage items get created.
3. Media is where you can manage your uploaded pictures and videos.
4. Pages is where you can see a list of all of the static pages on your website as well as create new ones.
We'll have more detail on how to use these to edit your site in later articles.
[](https://techhelp.slusd.us/uploads/images/gallery/2022-08/vWq19Ej2XEurdfbq-image-1659471186837.png)# Editing pages
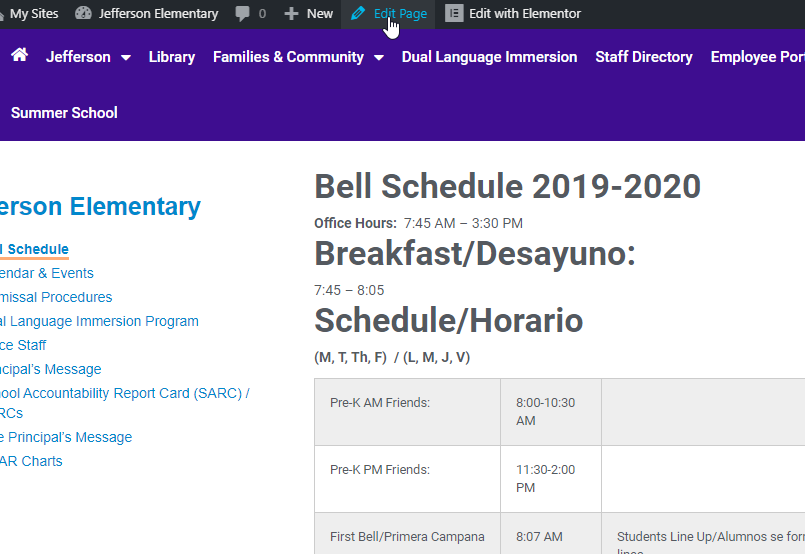
### Editing a page
Editing a page takes you to the same editor as creating a new one. To get here the easiest way is to just visit the page you want to edit and click the "Edit Page" button at the top.
You can also edit a page by going into the Pages section of the Wordpress admin panel.
[](https://techhelp.slusd.us/uploads/images/gallery/2022-08/3DBdtzJEHy3IE99r-image-1659471303113.png)
### Start Editing
1. Once on the page edit screen click the blue "Edit with Elementor" button to enter the Elementor Editor[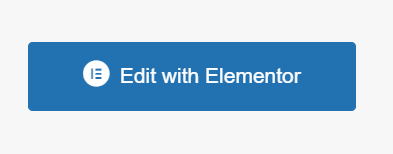](https://techhelp.slusd.us/uploads/images/gallery/2024-07/nA4tuX8b619ZiK8B-edit-with-elementor.png)
2. Once inside the elementor page editor
1. Click on the block you wish to edit to highlight it blue. Then make any changes directly on the page or in the editor pane on the left (highlighted in green)
2. Click the green "Update" button in the lower left to save your changes and make them live on the website.
[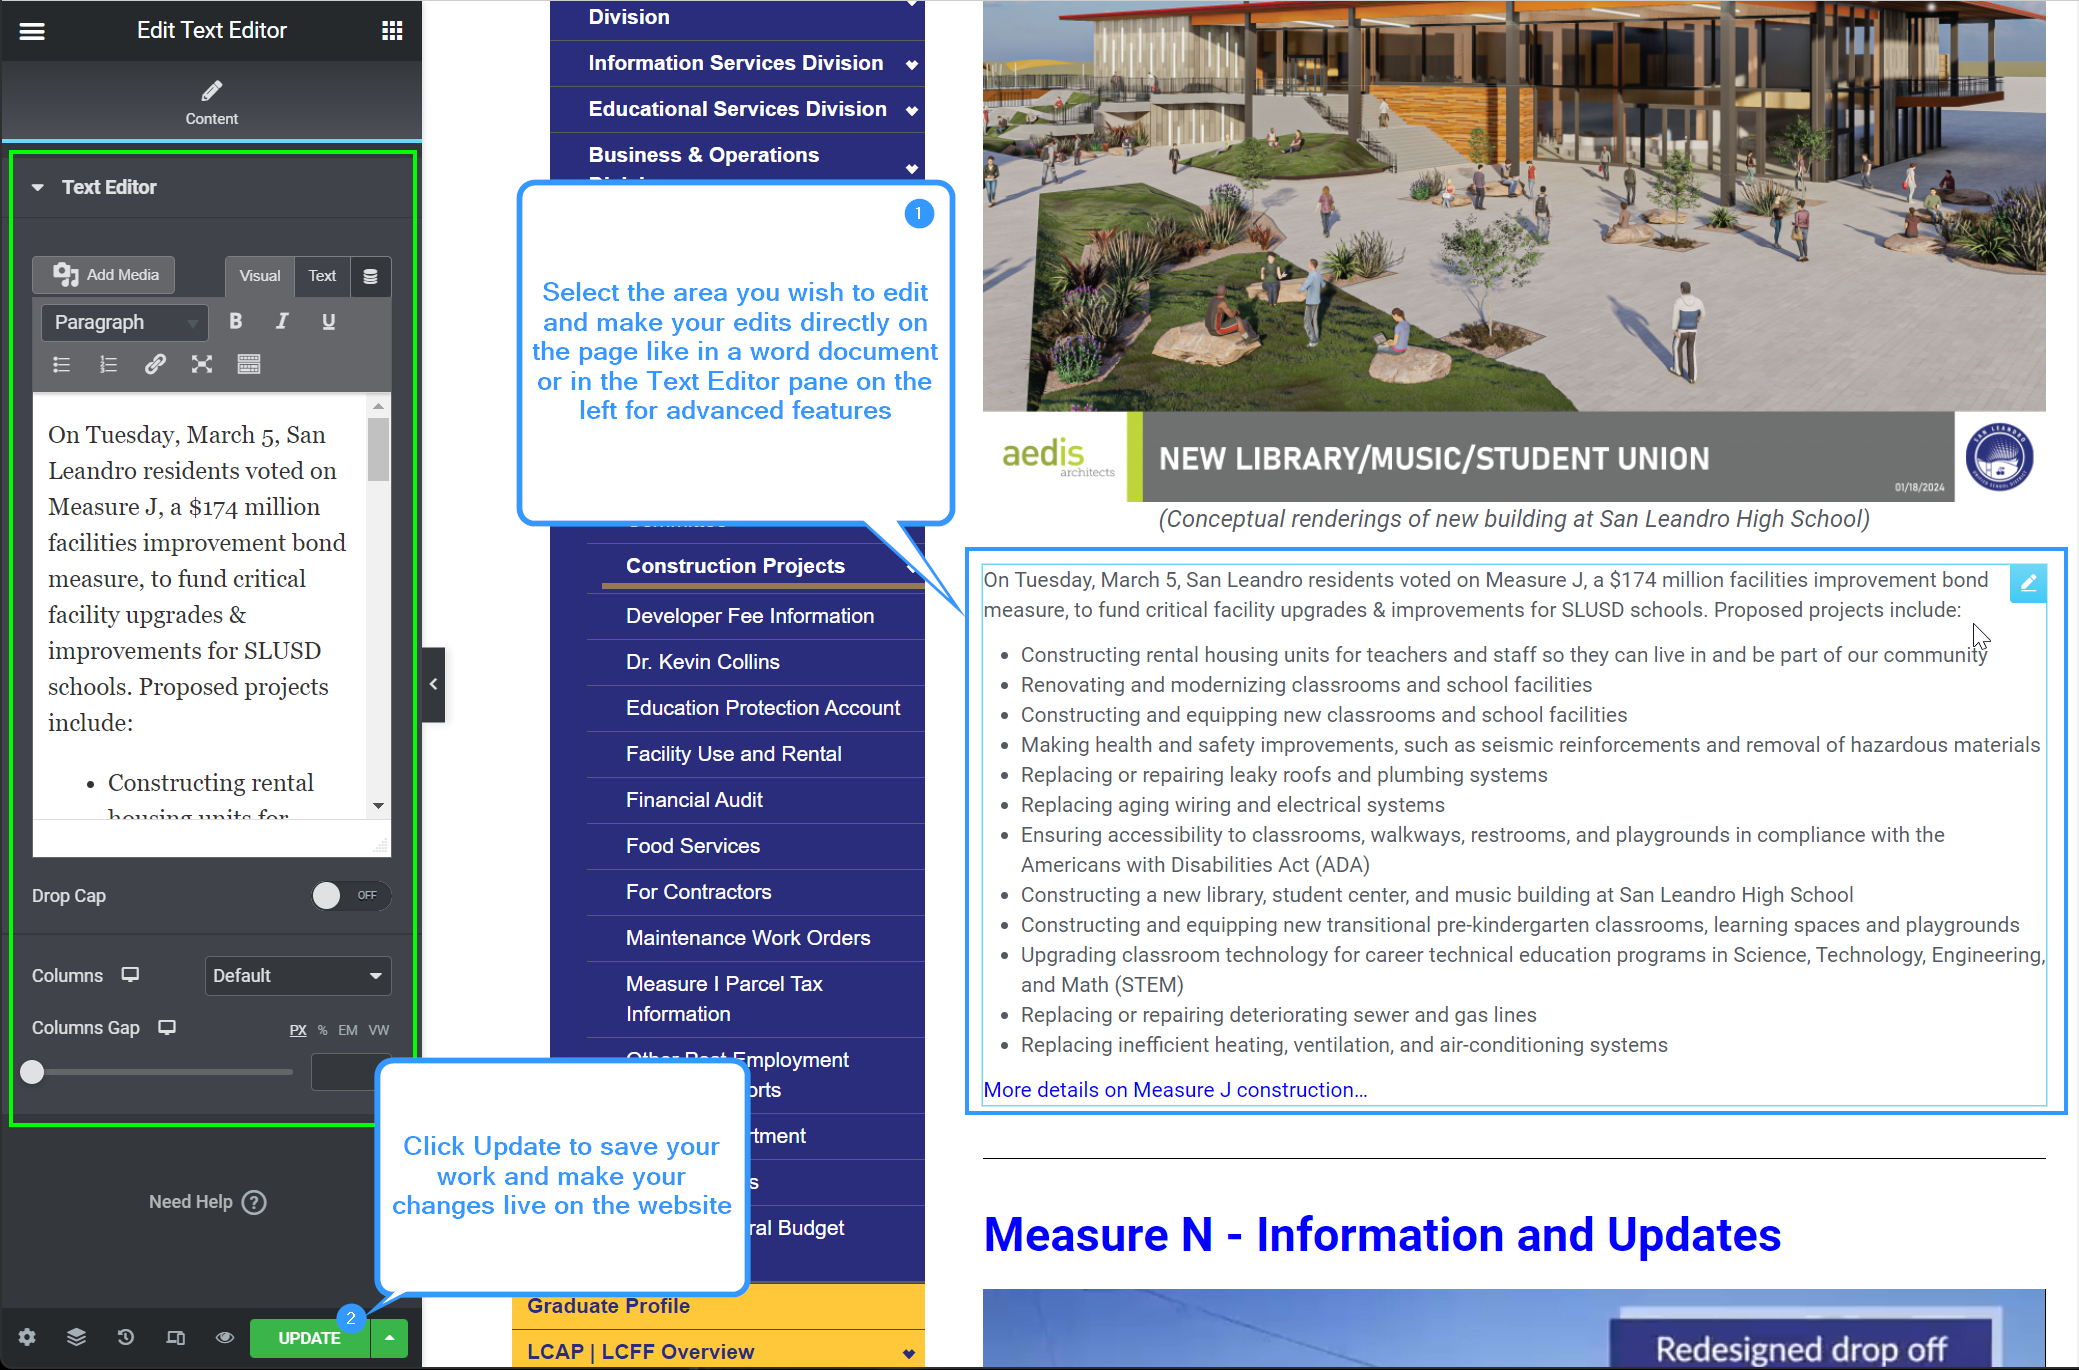](https://techhelp.slusd.us/uploads/images/gallery/2024-07/2x9A2TDOIV6ifCT3-elementor-page-edit.png)
Video:
[](https://drive.google.com/file/d/1YkPMgJu9ChyT4R0t2xWWMs3l_1ZBOUjr/view)
### Editing a page (advanced)
Video:
[](https://drive.google.com/file/d/1YmeDi3niE67fQP20AN5hUTtMZ3Cfwnf2/view)# Adding items to your slider
Reminder: Only the most recent 3 Frontpage Slider Category posts will display on your website
### Making Frontpage Slider Posts
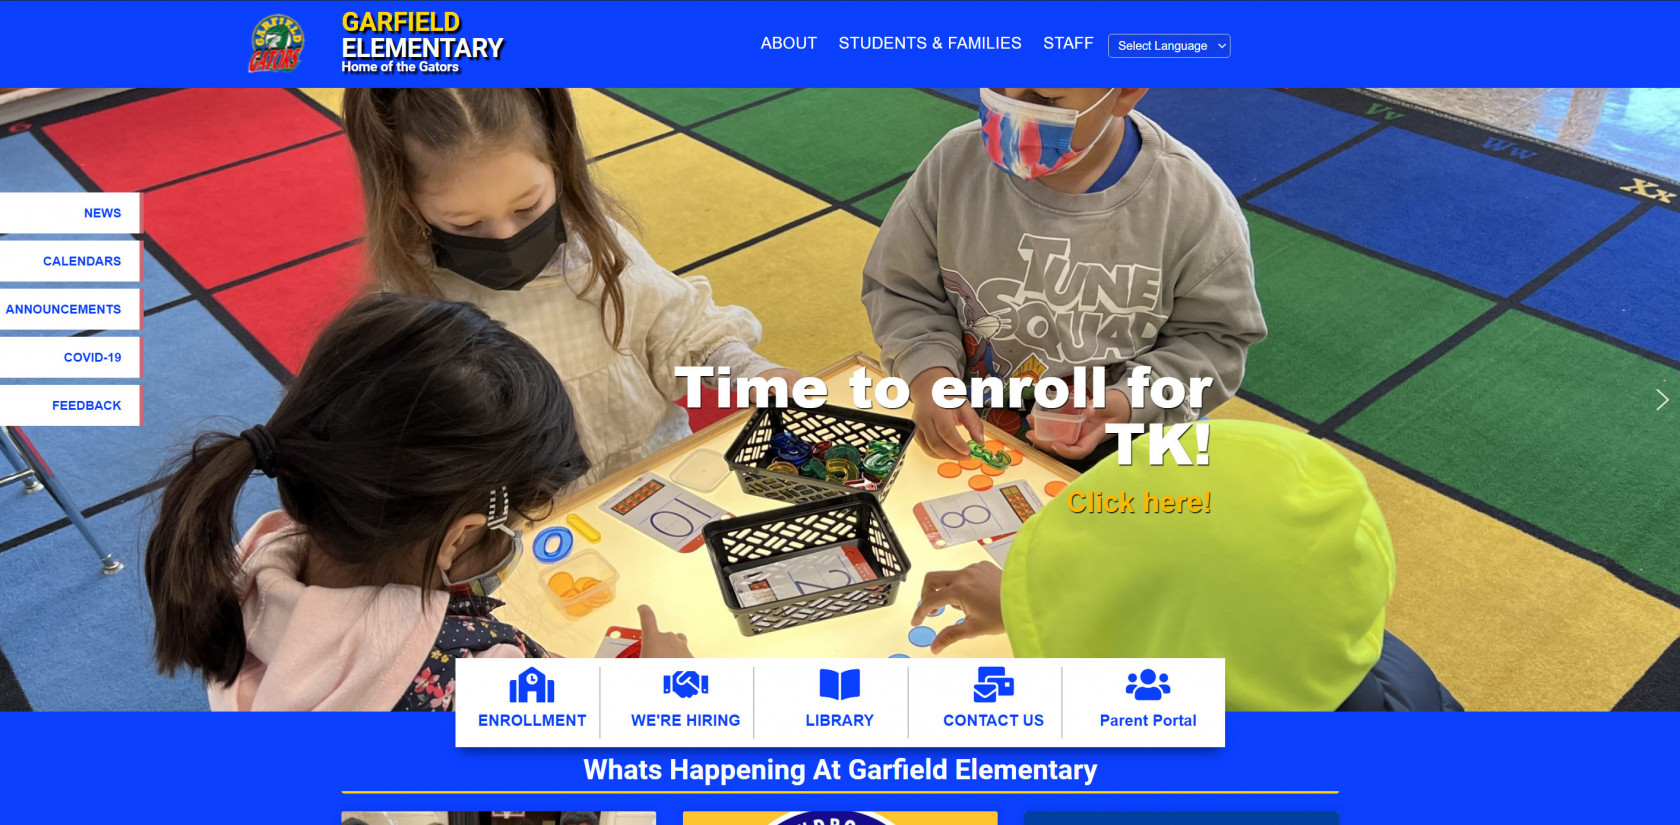
You are able to add a slider that has a box with title text and even links, i.e.:
[](https://techhelp.slusd.us/uploads/images/gallery/2022-08/2JAEx7gYkyb0Z5n8-2022-08-15-08-41-37-homepage-garfield-elementary.jpg)
1. There are a few extra steps to take when creating your Slider. To do this, first create your post as normal by signing into your Admin Dashboard clicking Posts on the left and then Add New[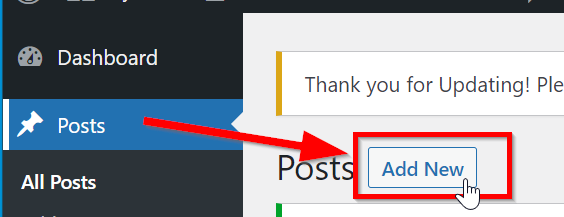](https://techhelp.slusd.us/uploads/images/gallery/2022-08/X9PYIVvxAQ6boygw-add-new-post.png)
2. Once in the Post editor you will need to add a Featured Image (if needed [Add The Image To Your Media Library](https://techhelp.slusd.us/books/slusd-website/page/adding-items-to-your-media-library) first) (1), set the Category to Frontpage Slider (2), give the post a title (3) and some additional text if desired (4).[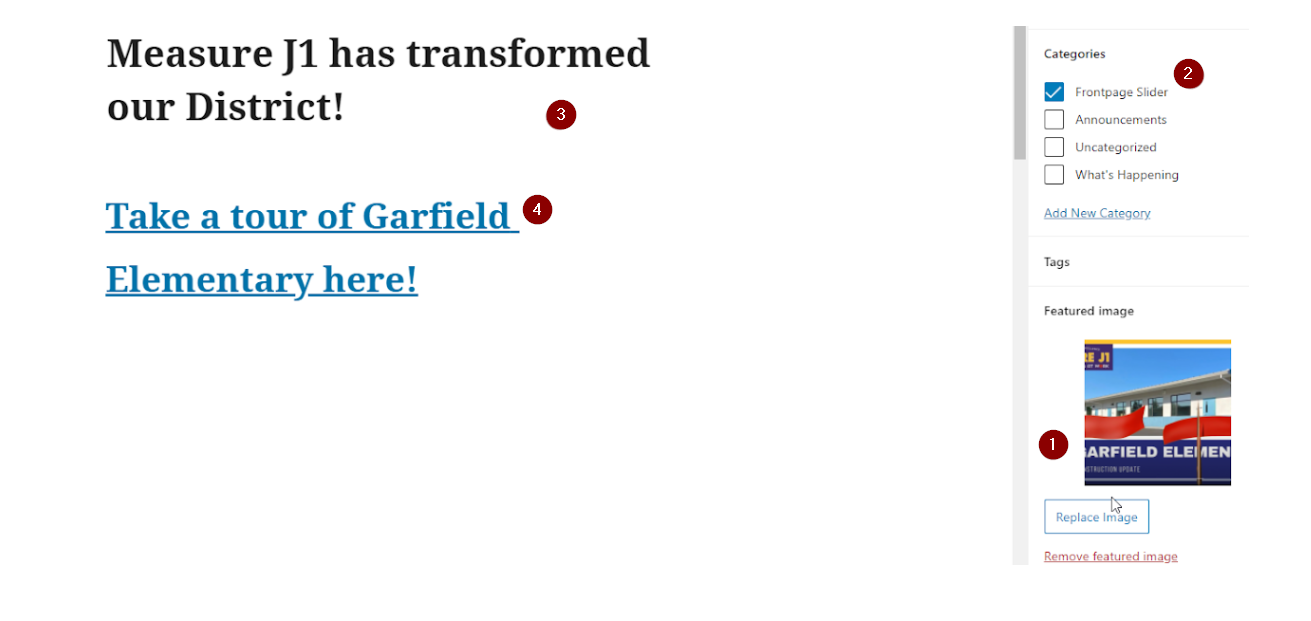](https://techhelp.slusd.us/uploads/images/gallery/2022-08/bZqdyxOB1b6ezjUE-create-a-frontpage-slider-post.png)
3. Once you are ready to post your new featured post to the website click the "Publish" button in the upper right of the editor[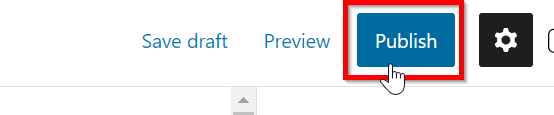](https://techhelp.slusd.us/uploads/images/gallery/2022-08/fEq20NYa4HVjgA8z-publish-a-post.png)
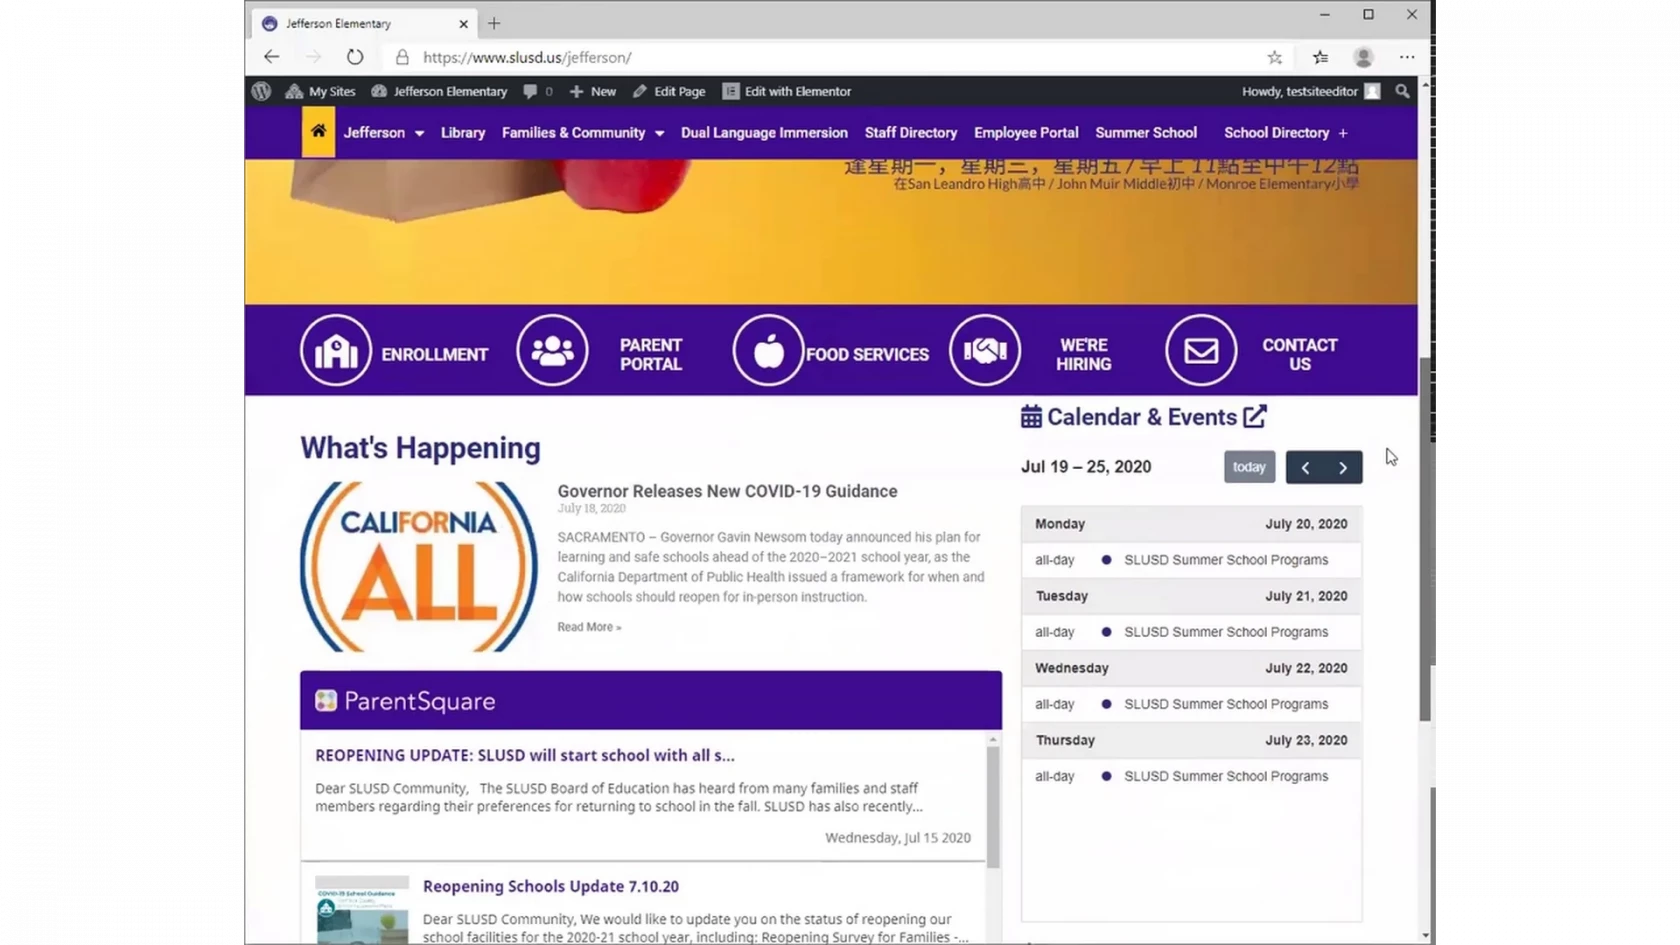
4. Your new frontpage slider post is now live on your website
# Adding What's Happening and Announcements to your frontpage
### Video:
[](https://drive.google.com/file/d/1ZFN5V_GmzeoKYz354japzF6lZXkvLV4d/view)# Adding events to your calendar
### Video:[](https://drive.google.com/file/d/1ZIYIRKfdhkoeC8J23NdcqSYcxdfcPQ9v/view)# Adding Items To Your Media Library
1. Log into your Dashboard by going to [www.slusd.us/wp-admin](http://www.slusd.us/wp-admin) and signing in.
2. Once on the dashboard navigate to your media library by finding "Media" on the left navigation bar and selecting "Library" [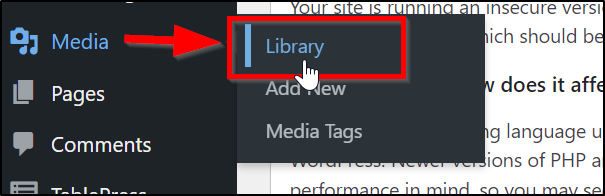](https://techhelp.slusd.us/uploads/images/gallery/2022-10/7k6dPj2wAFeiEl1t-image-1666908650360.png)
3. Once in the Media Library click "Add New" Then either "Select Files" or drag and drop your files into the dashed box to upload them [](https://techhelp.slusd.us/uploads/images/gallery/2022-10/HAs8CmrpNZceJDNy-image-1666908897586.png)
4. (optional) If you want to access the file's url to use in a link on your site click the newly uploaded picture or document and copy the File Url (the Blue Box in the image below)[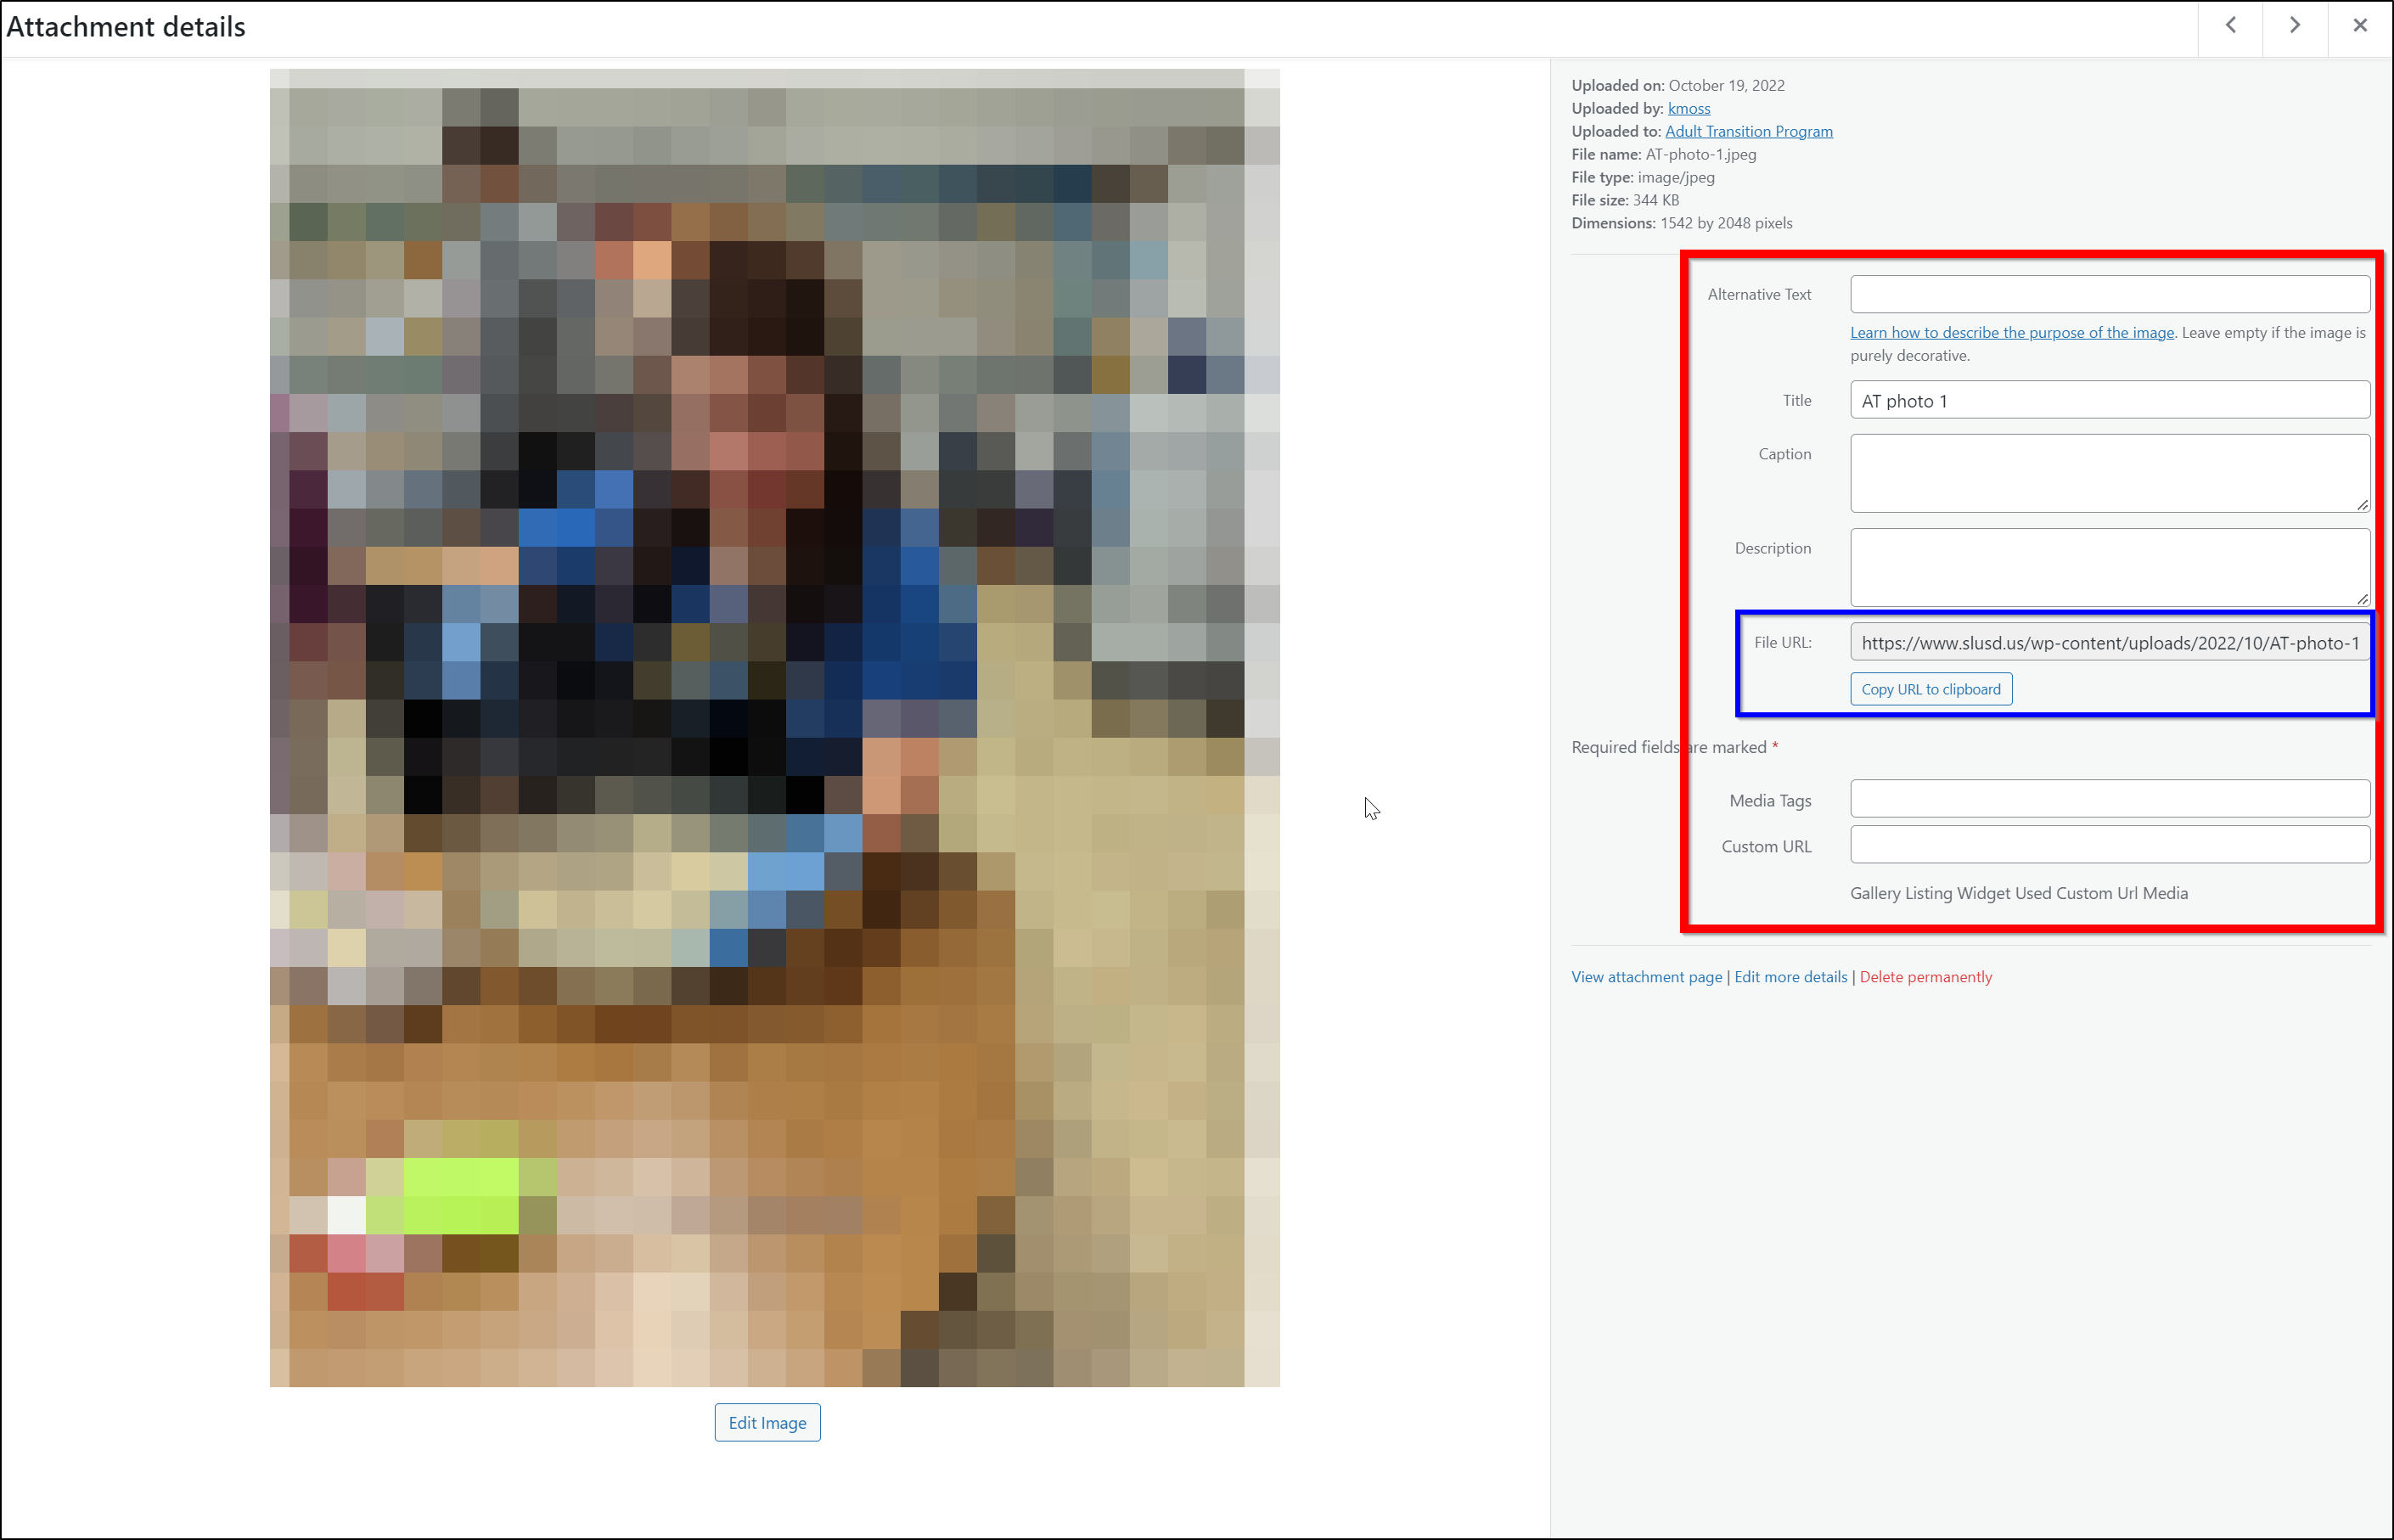](https://techhelp.slusd.us/uploads/images/gallery/2022-10/12jLZ5ibeBNpIcBv-image-1666909220418.png)# Additional Legacy Website Help
- [The basics - layout and navigation](https://sites.google.com/slusd.us/ithelp/tech-support/software/website/the-basics)
- [Adding and Editing pages](https://sites.google.com/slusd.us/ithelp/tech-support/software/website/addingediting-pages)
- [Adding images to your slider](https://sites.google.com/slusd.us/ithelp/tech-support/software/website/addedit-your-slider)
- [Adding news and announcements to your frontpage ](https://sites.google.com/slusd.us/ithelp/tech-support/software/website/add-news-and-announcements)
- [Adding events to your calendar ](https://sites.google.com/slusd.us/ithelp/tech-support/software/website/add-calendar-events)
- Updating your school directory (coming soon, for now email to support@slusd.us)
- Adding teacher websites - We are recommending teachers utilize the [new Google Sites](https://www.google.com/url?q=https%3A%2F%2Fsites.google.com%2Fnew&sa=D&sntz=1&usg=AOvVaw3Ze7baWLC_6YnUdcsHesq2) to create their classroom websites. It is very easy to create and edit as it feels much closer to Google Docs so it should be easy for teachers. There is a great little video tutorial on how to use this to create sites [available here](https://www.youtube.com/watch?v=w05NIgHNzWs) which will get them up and running. Please contact for assistance creating these new sites and to send us the link to have added to your school directory.# Parentsquare Post Integration - Post to "What's Happening"
Any post made to Parentsquare can automatically be published as a post under "What's Happening"
1. In Parentsquare, navigate to the post you wish to make public on your website,
click the gear icon --> Share --> Share on Website[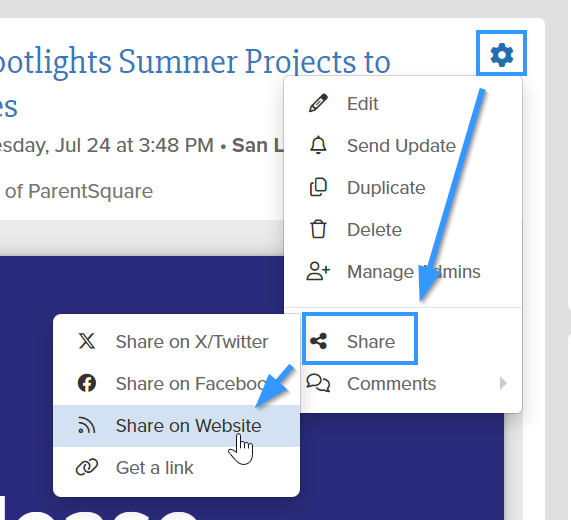](https://techhelp.slusd.us/uploads/images/gallery/2024-07/TQE0aH5kSv8nK01i-image-1722455349244.png)
2. You will then see the banner below on the post title in Parentsquare. [](https://techhelp.slusd.us/uploads/images/gallery/2024-07/j8Wj2NRCRrv2vLow-image-1722455684087.png)
3. Within 30 minutes the parentsquare post will show up on your website under "What's Happening"# Updating your website's phone directory
The website's staff directory is automatically updated by combining Aeries and Escape data. However, if you need to make manual updates to the directory, please use the "Staff Directory v2" module in your website's dashboard to make the updates.
Please see the guide below after signing in to make manual updates: